Before I start giving you the models' tricks with eyes, be sure you are using a really good light and a mirror you can get close to. You'll need powder, tweezers, an eyebrow brush, a sharp black eye liner pencil or the cake type with a brush, an eyebrow pencil that closely matches the color of your own brows, a charcoal-gray eye liner, and black mascara. And you'll need brown eye shadow and creamy-white eye makeup.
Look at your eyes in the mirror to learn your problems. Everyone needs eye makeup. Though models do exaggerate their eye makeup for the camera, they don't overdo it like some of the girls you see on the street the idea is not to look like a clown who hasn't had enough sleep.
Eye makeup is no longer just for models or actresses or gaudy girls-it's for everybody; and if you'll look washed out and drab today. It's just as important as lipstick and you know you wouldn't want to be seen without that (unless you're under seventeen).
EYE SHADOW
First, eye shadow. If you want a color, choose one that compliments the color of your eyes and blends with your clothing. Muted shades are always best for daytime, and our model prefer the browns, grays, mushroom shades, and white to the more vivid colors, which really are better for the evening hours.
For daytime, put a line of shadow on the upper lid, blending with your forefinger or brush in a wide line as close as possible to the lashes. Blend it up, down, and to either side, to cover the whole lid up to the crease. You can extend it out a bit beyond your eyes to make them look larger. The shadow must never look patchy or heavy. Now powder lightly to set the shadow (pressing it on rather than rubbing) and dust away the excess with a tissue. Now you can, if you wish, apply a little more shadow if you want the color more definite. For a heavy-lidded look, apply a brown or gray line with a brush, in an arch, along the crease.
EYE LINER
Apply your eye liner as close to your lash roots as possible. You do this by drawing a line from the inner edge of the upper lid out to the outer corner, making the line a little wider as you go out. If your hand seems shaky at first, that's quite natural. Don't worry, by the end of a week, if you practice every day, it will seem very simple. Choose your weapon use a black pencil, well-sharpened, or a brush and cream, or cake liner. Fashion models always use black, but you may not want so much emphasis. If so, choose brown or dark gray. Don't make the line too heavy; start with a very thin line at the inner corner and let it widen just a bit as you get toward the outer edge. Don't draw the line close to the very end of your eye, but a quarter-inch from the end start a slight upward curve. Never extend it beyond the crease of the eye.
Now take the liner and make a very, very thin line just under the outer corner of the lashes and extended out a bit. And you can, with a very fine brush, draw on some tiny lower lashes.
Tricks with eye liners: You can change the shape and spacing of your eyes to a considerable extent with the use of lines and shades of makeup.
To enlarge your eyes: take your black liner and outline your top lid, extending the eyeline a fraction, about a sixteenth of an inch, beyond the natural corner of your top lid. Now take a charcoal gray or brown eye liner-or brown eye shadow and brush-and draw a line along the lower lid,starting about a quarter-inch from the outer corner, and extend it out until it meets the black line, forming a tiny triangle. Fill in the triangle with white eye makeup applied with a brush.
Another way to make your eyes look larger, suggested one of our most successful girls, is to make a tiny line of white eye makeup at the outer corners. Then draw your upper eyeline, extending it outward about a sixteenth of an inch. With the charcoal or brown eye liner, draw a line starting just inside the outer corner of the lower lid and extend straight out parellel with the two other lines. Draw the lines softly and subtly, and no one will know that your eyes are anything smaller than saucers .
A third trick to make small eyes seem much larger and large eyes positively enormous: draw a thin brown line under the brow just under the bone. Once drawn, the line is almost erased, with just a hint remaining.
If your eyelids are too heavy, use a darker shade of makeup on the lids over your regular shade. Then use white or a light shade of makeup under your brow above the crease.
If your eyes are too deep-set, use light eye makeup on the eyelid above a narrow line of eye shadow. Then apply darker makeup on the area above the crease and under the brow. Blend carefully. Almost every model uses this trick. If your eyes are extremely deep-set, apply mascara only to the ends of the lashes.
For eyes that are too close together, apply white eye makeup between your nose and the inner corners of youre eyes. Then blend a little a fraction of an inch along your upper lid. Start your eye shadow, eye liner and mascara only along the outer half of your eye, extending it outward.
EYEBROWS
Always choose an eyebrow pencil in a shade that closely matches your hair. It may be a slightly intensified tone, but never, never use a black pencil. If you are a brunet, dark brown is your eyebrow pencil color. Brownettes, from medium to light, should use one of the paler brown shades. There are reddish pencils for redheads and blonds look marvelous with pale brown flecked with gray. Try using a gold pencil for highlights in red brows and an auburn color in very dark brows.
Do not draw just one line and call it an eyebrow. Use light short strokes, as if you were creating each new hair, and keep the look perfectly natural. Start on the center and work out. If you need a slight arch on the upper side, draw it hair by hair. Any other shaping should be done with tweezers, except for lengthening if your brows are too short. Some models draw against the grain-try it and see if this is easier for you.
It is vital never to distort your brows: they should be as individual as the shape of your face, and they should never be too thin or artificial. Most brows need only a little tweezing and then only for shape. The natural look is the fashion look today.
Before you pluck your eyebrows, brush them up and then sideways. This should show you their true natural shape. Apply a little cream to the area. Pluck out any straggly hairs between the brows-the brows should start at the inner corners of your eyes. Then pluck out ayn stray hairs beneath. If they need a slight arching, pluck from below only. Go slowly and don't go overboard. You must leave most of your own eyebrows-just pluck enough to produce a shape.
The best way to decide how to correct your brows is to apply makeup base over them. Then, staring in the mirror, experiment by drawing a few different shapes with your eyebrow pencil. Do only one brow at a time, so you can see the difference.
Tricks with eyebrows: Small eyes: make your brows a little thicker by building them up just a bit on top to emphasize them. Clear out straggly hairs underneath, and arch them slightly in the outer third to give more space.
Deep-set eyes: again enlarge the space between the eyes and brows-raise the brows slightly by penciling in a little above the bone.
Eyes too close together: widen the space between the brows a little by plucking, and extend the pencil line at the ends.
Eyes too far apart: pencil eyebrows a little closer to the nose, and do not extend them out at the ends.
Bulging eyes: tweeze out any hairs that grow down too far over your eyes and raise the brows slightly from below.
EYELASHES
Eyelashes do not grow in a straight line, but in two or three irregular rows, growing more heavily in the center of the lid. A lash reaches its full lenght in about ten weeks, and each one lives from three to five months. Like the hairs on your head, there is nothing you can do directly to stimulate growth. It's wishful thinking to try gently pulling them or applying petroleum jelly-it doesn't help. All you can do is enhance what you've got. If you're lucky, you'll have your qwn long silky lashes. If you're not, you can dress up what you've got with mascara or fake lashes.
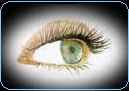
First, arm yourself with an eyelash curler. When the lashes are straight, they tend to curtain the eyes and make them look smaller. When they are swept upward, more of the iris is revealed and they seem larger and more luminous. To achieve this wide-eyed effect takes exactly thirty seconds. Grip the hairs gently with the curler, count up to thirty, and release. For a more pronounced curl, release the grip and move to a new position two or three times. Another reason this is a good idea is to keep the lashes from brushing against the lenses of your eyeglasses if you wear them.
MASCARA
Choose the type of mascara you like best-cream, cake, waterproof, or otherwise. Whatever you choose, get any color as long as it's black. The only exception to this rule is if you have absolutely white brows and lashes; then choose brown. Be sure your eye liner is on perfectly before you start with the mascara.
With a brush or wand, apply the mascara with upward and outward strokes. Don't use too much or your lashes will become matted. Now lightly pat on loose power or apply lash builder. Then mascara again. If you want to be really dramatic, you can repeat this a couple more times. You'll be astounded at the new "growth" you've produced.